OAT FLOUR WAFFLES (GLUTEN-FREE)
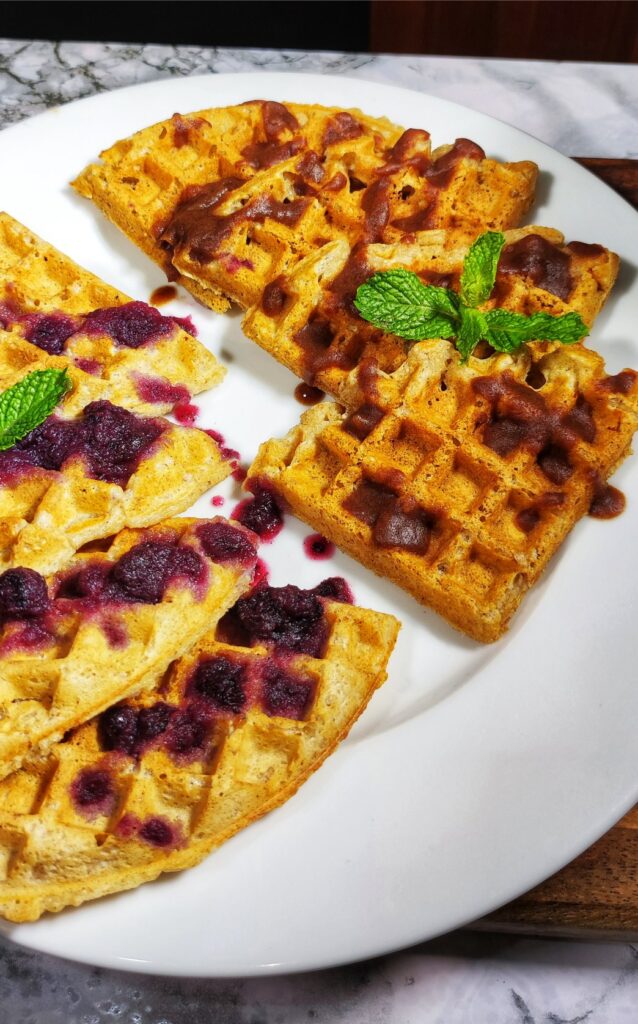
If the question is, why gluten-free, dairy-free, and processed sugar-free waffles, then my answer is that food sensitivities and illnesses can be so restricting to those of us who just want to be able to eat some of the foods we love and enjoy. And if you enjoy a waffle the way that I do, then you will surely understand why having these options is important. Another thing that is of equal importance is taste, and let me tell you, these waffles are light, slightly crispy, bursting with flavor, and wholesome. They are certainly a delightful twist on a classic morning favorite. Get ready to savor each bite of these light and fluffy waffles, knowing that they are not only delicious but also cater to your dietary needs.
INGREDIENT DETAILS
- Oat Flour:
- Oat flour is a gluten-free flour made by grinding oats into a fine powder. It adds a nutty flavor and a hearty texture to baked goods. - Coconut Milk:
- Coconut milk is a creamy, dairy-free alternative to traditional milk. It adds richness and a subtle coconut flavor to recipes. - Water:
- Water is used to adjust the consistency of the waffle batter and ensure that the dry ingredients are well incorporated. - Date Sweetener:
- Date sweetener is a natural sweetener made from dates. It adds sweetness and a hint of caramel flavor to the waffles. - Corn Starch:
- Corn starch is a fine white powder used as a thickening agent in the waffle batter. It helps the waffles achieve a light and crispy texture. - Baking Powder:
- Baking powder is a leavening agent that helps the waffles rise and become fluffy when cooked. - Ground Nutmeg:
- Ground nutmeg is a warm and aromatic spice that adds a cozy flavor to the waffles. - Cinnamon Powder:
- Cinnamon powder is a sweet and slightly spicy spice that enhances the overall flavor profile of the waffles. - Salt:
- Salt enhances the flavors of the other ingredients and balances the sweetness in the waffles.
These ingredients come together to create a delicious and wholesome gluten-free waffle recipe that is perfect for a satisfying breakfast or brunch option. Enjoy the blend of flavors and textures in each bite of these delightful waffles!
INGREDIENTS & ALTERNATIVES
- Oat Flour:
- Alternative: Almond flour, rice flour, or a gluten-free all-purpose flour blend. - Coconut Milk:
- Alternative: Almond milk, soy milk, oat milk, or dairy milk if lactose tolerance is not a concern. - Water:
- No direct alternative, but you can use other liquids like apple juice or orange juice for added flavor. - Date Sweetener:
- Alternative: Maple syrup, honey, agave nectar, or coconut sugar. - Corn Starch:
- Alternative: Arrowroot powder, tapioca starch, or potato starch. - Baking Powder:
- Alternative: Baking soda (use half the amount and add an acidic ingredient like vinegar or lemon juice for activation). - Ground Nutmeg:
- Alternative: Ground cinnamon, allspice, or pumpkin pie spice. - Cinnamon Powder:
- Alternative: Ground cardamom, ginger powder, or nutmeg. - Salt:
- Alternative: Sea salt, Himalayan pink salt, or kosher salt.
These alternative ingredients can be used as substitutes based on dietary preferences, flavor variations, or ingredient availability. Feel free to experiment with these alternatives to customize the recipe to your liking.
These delicious gluten-free/ vegan waffles are made with oat flour and coconut milk and lightly sweetened with my homemade date sweetener. This recipe combines wholesome ingredients like date sweetener and aromatic spices to create a delightful breakfast treat. Enjoy light and fluffy waffles that are perfect for a cozy morning meal or a special brunch.
- 1 1/4 - cups Oat flour
- 1 - cup Coconut Milk (or the plant-based milk of your choice)
- 1/4 - cup Water
- 2 - tbsp Date Sweetener
- 2 - tbsp Corn Starch
- 2 1/4 - tsp Baking Powder
- 1 - tsp Ground Nutmeg
- 1/8 - tsp Cinnamon Powder
- 1/8 - tsp Salt
- - Oil Spray
- 1 1. To coconut milk, add apple cider vinegar, give it a quick stir, and set aside for 10 mins. The milk will thicken somewhat, giving a texture similar to buttermilk.
- 2
2. In a medium-sized mixing bowl, add oat flour, baking powder, cornstarch, nutmeg powder, cinnamon, and salt. Mix well.- 3
3. Gradually whisk in your milk to ensure everything is well incorporated. Set aside the mixture for 5-7 mins while you preheat your waffle iron.- 4
*NOTE: I use a non-stick iron, but I still use the oil spray on it while hot to prevent possible sticking.*- 5
4. Your mixture would have thickened considerably now that it has absorbed the liquid. Now, whisk in your water.- 6
5. Spray waffle iron with olive oil spray then pour batter onto the waffle iron and cover. Remove the lid once steam has stopped rising from the iron, but you can remove the waffle itself once it is golden in color.Note1. Consistency of Batter:
- Pay attention to the consistency of the waffle batter. It should be thick but pourable. If it's too thick, add a little more liquid (coconut milk or water). If it's too thin, add a bit more oat flour to adjust.
2. Preheating the Waffle Iron:
- Make sure to preheat your waffle iron according to the manufacturer's instructions. This ensures that the waffles cook evenly and develop a nice golden color.
3. Cooking Time:
- Cooking times may vary depending on your waffle iron. Follow the recommended cooking time provided by the manufacturer, but keep an eye on the waffles to prevent overcooking.
4. Oil or Spray for Non-Stick:
- Even if using a non-stick waffle iron, it's a good idea to lightly grease the surface with cooking spray or oil before pouring the batter to prevent sticking.
5. Mixing the Batter:
- Avoid overmixing the batter once you add the liquid ingredients. Mix until just combined to prevent tough waffles.
6. Customization:
- Feel free to customize the recipe by adding your favorite mix-ins such as chocolate chips, berries, or chopped nuts to the batter for added texture and flavor.
7. Serving Suggestions:
- Serve the waffles warm with toppings like fresh fruit, maple syrup, yogurt, or a dollop of a fruit sauce for a delightful breakfast or brunch experience.
8. Storage and Reheating:
- Store any leftover waffles in an airtight container once cooled. Reheat them in a toaster, oven, or microwave for a quick and convenient breakfast option.
By keeping these cook's notes in mind, you can confidently prepare and enjoy your gluten-free coconut milk waffles to perfection.
waffles, gluten free waffles, oat flour, oat flour waffles, vegan sweetener, natural sweetner, - 2