


This Coconut Condensed Milk is one of those simple homemade staples that can completely transform your dessert game. Made with powdered coconut milk, sugar, and water, it creates a rich, silky, dairy-free condensed milk substitute that works beautifully in everything from coconut fudge and homemade ice cream to coffee, cakes, and classic Caribbean sweets. It’s smooth, sweet, creamy, and incredibly useful to keep stocked in the fridge.
What makes this recipe special is how accessible and budget-friendly it is. Instead of relying on canned versions that may be expensive or hard to find, this homemade coconut condensed milk uses pantry ingredients you can keep on hand. The sugar syrup creates the glossy sweetness and thick body, while the powdered coconut milk brings rich flavor and creamy texture without needing dairy.
This recipe fits beautifully into Caribbean cooking where condensed milk plays such an important role in desserts, drinks, and holiday treats. Whether you’re making coconut sweet bread, fudge, ponche de crème variations, or simply stirring a spoonful into tea or coffee, this Coconut Condensed Milk gives you flexibility and flavor with a naturally tropical finish. It’s especially helpful for dairy-free baking while still delivering that familiar indulgent richness.
INGREDIENT DETAILS
Water (2 cups)
Forms the liquid base of the syrup and helps dissolve the sugar evenly for a smooth final texture.
Granulated Sugar (2 cups)
Creates the sweetness, thickness, and glossy consistency that gives condensed milk its signature rich body.
Salt (1/4 tsp)
Balances the sweetness and helps round out the coconut flavor without making the mixture taste flat.
Powdered Coconut Milk (1 1/2 cups)
Provides the creamy richness and full coconut flavor that makes this a dairy-free condensed milk alternative.
INGREDIENT ALTERNATIVES
Water
No substitute needed
Granulated Sugar
– Cane sugar
– Light brown sugar (for a slightly deeper flavor)
Salt
– Sea salt
– Fine pink salt
Powdered Coconut Milk
– Powdered whole milk (if dairy is fine)
– Powdered oat milk (if available, for another dairy-free version)
If you enjoyed this recipe then check out my other HOMEMADE COCONUT CONDENSED MILK made with canned or boxed Coconut Milk

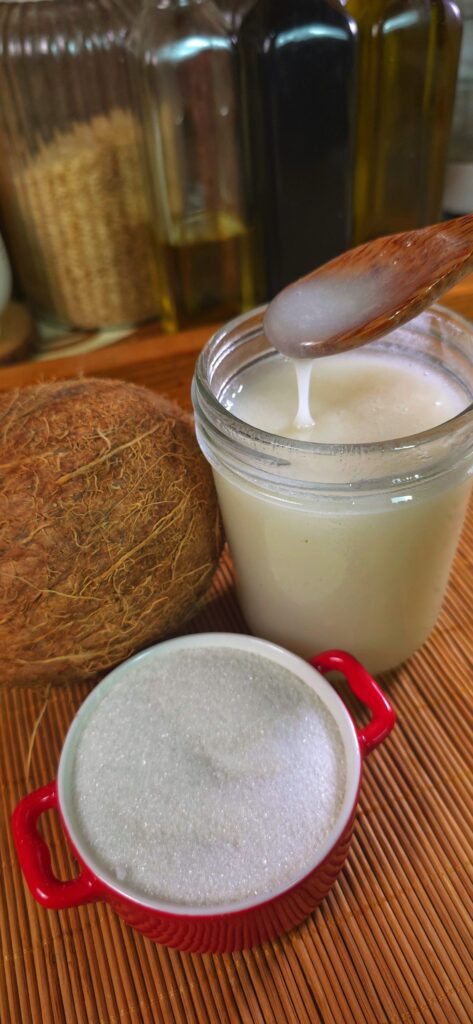
Coconut Condensed Milk (with Powdered Coconut Milk)
Description
This Coconut Condensed Milk is a smooth, sweet, and versatile homemade alternative to traditional condensed milk. Perfect for baking, desserts, coffee, and Caribbean treats, it delivers creamy coconut flavor with an easy pantry-friendly method.
Ingredients
Instructions
-
Add the water, granulated sugar, and salt to a medium saucepan over high heat. Stir well until the sugar has fully dissolved and the mixture becomes clear.
-
Allow the syrup to come to a rolling boil and let it boil for about 4–5 minutes. This helps create the rich sweetness and slightly thicker consistency needed for condensed milk. Remove from the heat and allow the syrup to cool completely before blending.
-
Once the syrup has fully cooled, pour it into a blender. Add the powdered coconut milk and blend until the powder is fully incorporated and the mixture becomes completely smooth, creamy, and glossy with no lumps remaining.
-
Pour the finished coconut condensed milk into clean, sanitized glass jars or airtight containers. Refrigerate until chilled and slightly thickened before using.
-
Use in desserts, baking, coffee, puddings, or any recipe that calls for sweetened condensed milk.
Note
Make sure the sugar syrup cools fully before blending.
Adding powdered coconut milk to hot syrup can cause clumping and affect the final smooth texture.
For an even thicker consistency, allow the mixture to chill overnight in the refrigerator before using.
It naturally thickens more as it cools.
If your coconut condensed milk separates slightly in the fridge, this is completely normal. Because it is homemade and free from stabilizers, some natural separation may happen over time. Simply stir well, shake the jar, or give it a quick whisk before using to bring it back together.
Store in a clean airtight glass jar in the refrigerator for up to 10–14 days. Always use a clean dry spoon when scooping to help extend shelf life and prevent contamination.
Do not leave at room temperature for extended periods, especially in warm climates, as this can shorten freshness quickly.
Freezing is not usually recommended, as thawing can affect the creamy texture and cause graininess or heavier separation.
For extra flavor, you can add a small splash of vanilla extract after blending for a softer dessert-style finish.
